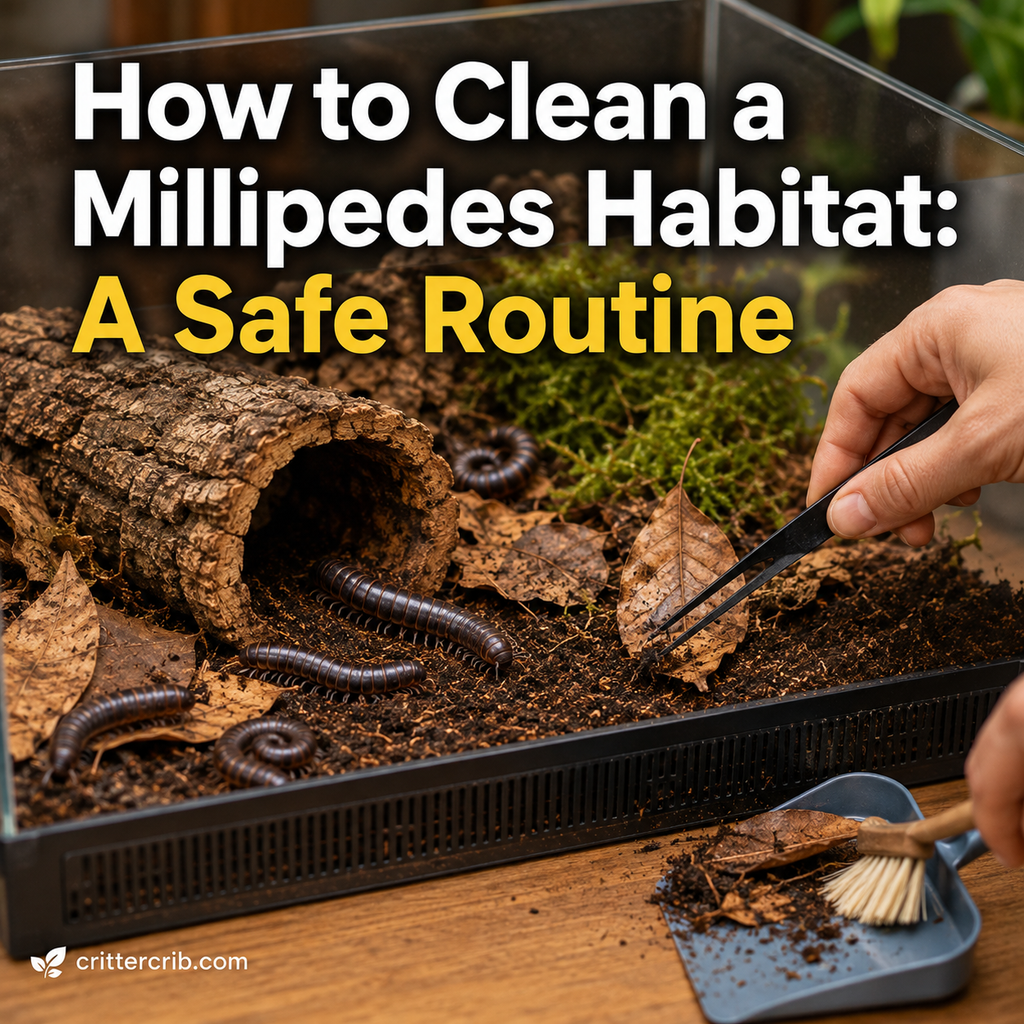
Cleaning a millipede habitat is a little different from cleaning a hamster cage or reptile enclosure. You don’t want to strip everything out, scrub the tank until it smells sterile, and replace all the substrate every week.
In fact, doing too much cleaning can be worse than doing too little.
A millipede enclosure is meant to function like a miniature forest floor. The substrate, decaying leaves, wood, moisture, and microorganisms are all part of that environment. Many millipedes also eat material directly from the substrate, so replacing it constantly removes an important part of their habitat and food supply.
The better approach is simple: clean small problems regularly, remove spoiled food before it becomes a mess, and disturb the deeper habitat only when necessary.
Here’s how to clean a millipede habitat safely without turning routine maintenance into a major disruption.
How Often Should You Clean a Millipede Habitat?
Most millipede enclosures don’t need frequent complete cleanings.
Instead, use a combination of:
- Regular observation
- Spot cleaning
- Removal of spoiled food
- Cleaning the water dish, if one is provided
- Occasional substrate maintenance
- Partial substrate replacement when necessary
How often you’ll need to do each task depends on the size of the enclosure, number of millipedes, ventilation, humidity, food offered, and how well the substrate is functioning.
A healthy enclosure may go a long time without needing a complete substrate change.
The goal isn’t to follow a strict calendar. It’s to maintain stable, clean conditions while disturbing the habitat as little as possible.
Why You Shouldn’t Over-Clean a Millipede Enclosure
Millipedes aren’t living on disposable bedding.
For many commonly kept species, the substrate itself is an important source of nutrition. A well-prepared substrate can contain decomposing hardwood leaves, decayed wood, and other organic material the millipedes consume.
That makes frequent total substrate changes unnecessary and potentially counterproductive.
Over-cleaning can:
- Remove useful decomposing material
- Disturb beneficial microorganisms
- Destroy tunnels and hiding areas
- Stress the millipedes
- Disrupt moisture levels
- Accidentally disturb a molting millipede
Think of the enclosure as a small ecosystem rather than a cage that needs to be disinfected constantly.
A Simple Millipede Habitat Cleaning Schedule
You can divide maintenance into three basic levels.
Daily or Every Few Days
Take a quick look at the enclosure.
Check for:
- Spoiled fresh food
- Unusual mold growth
- Water dish contamination
- Excessive dryness
- Standing water
- Escaped or injured millipedes
- Obvious waste or debris that needs removal
This usually takes less than a minute.
Weekly Maintenance
Once a week, take a slightly closer look.
You may need to:
- Wipe dirty areas of the glass
- Clean the water dish
- Remove old supplemental food
- Check ventilation openings
- Add leaf litter
- Check substrate moisture
- Inspect cork bark and hides
- Remove problem mold if necessary
You don’t need to dismantle the enclosure.
Periodic Maintenance
Every few months—or whenever the habitat actually needs it—inspect the condition of the substrate more carefully.
You may need to add:
- Fresh decaying leaves
- Rotten hardwood
- Additional substrate
- Calcium, depending on your setup
Partial substrate replacement may eventually be useful, particularly as the organic material is consumed and broken down.
Let the condition of the habitat determine the schedule rather than replacing everything automatically.
What You’ll Need for Safe Cleaning
Millipede enclosure maintenance doesn’t require many supplies.
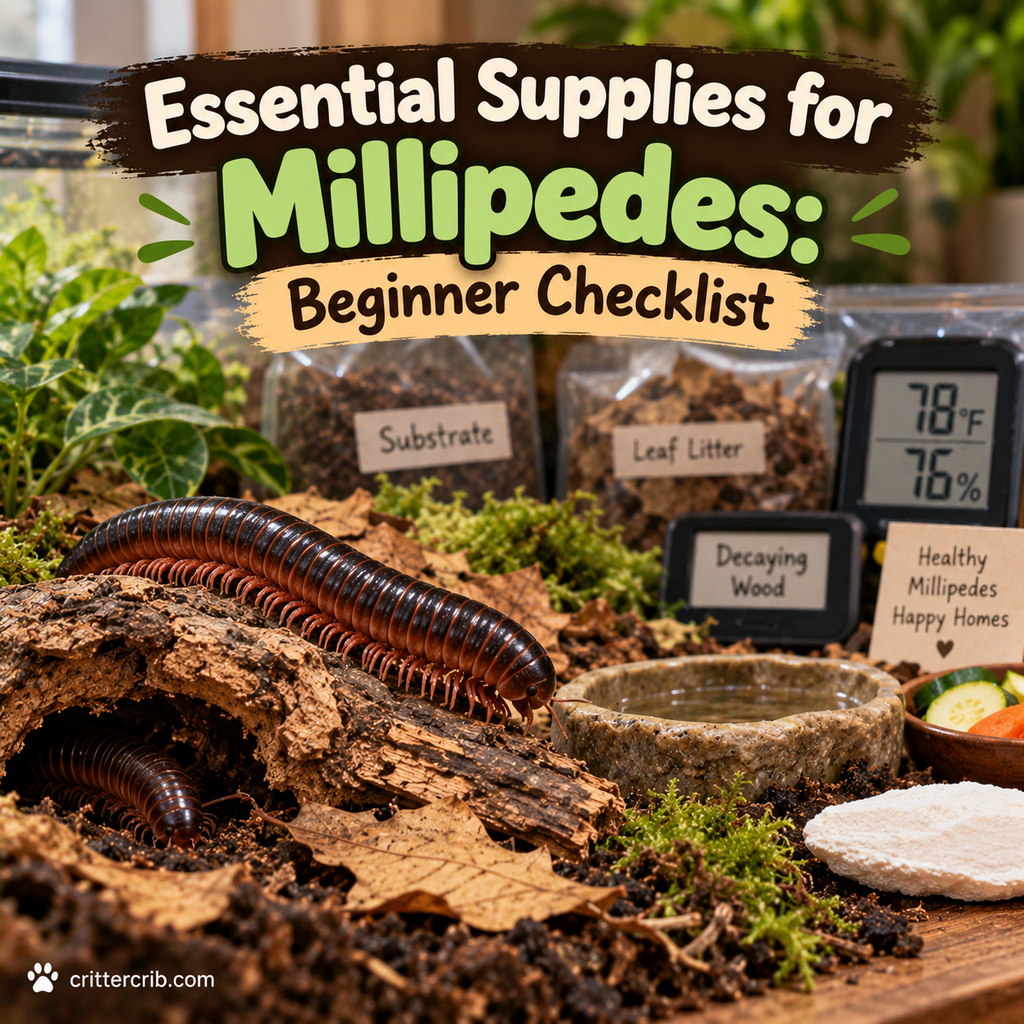
Useful items include:
- Disposable gloves
- Small spoon or scoop
- Soft brush
- Paper towels or clean cloth
- Container for temporary holding if necessary
- Dechlorinated water
- Replacement leaf litter
- Prepared millipede substrate
- Clean cork bark or hides when replacements are needed
Keep tools used for the millipede enclosure separate from tools exposed to household cleaners or pesticides.
You don’t want chemical residues accidentally entering the habitat.
Step-by-Step: How to Clean a Millipede Habitat
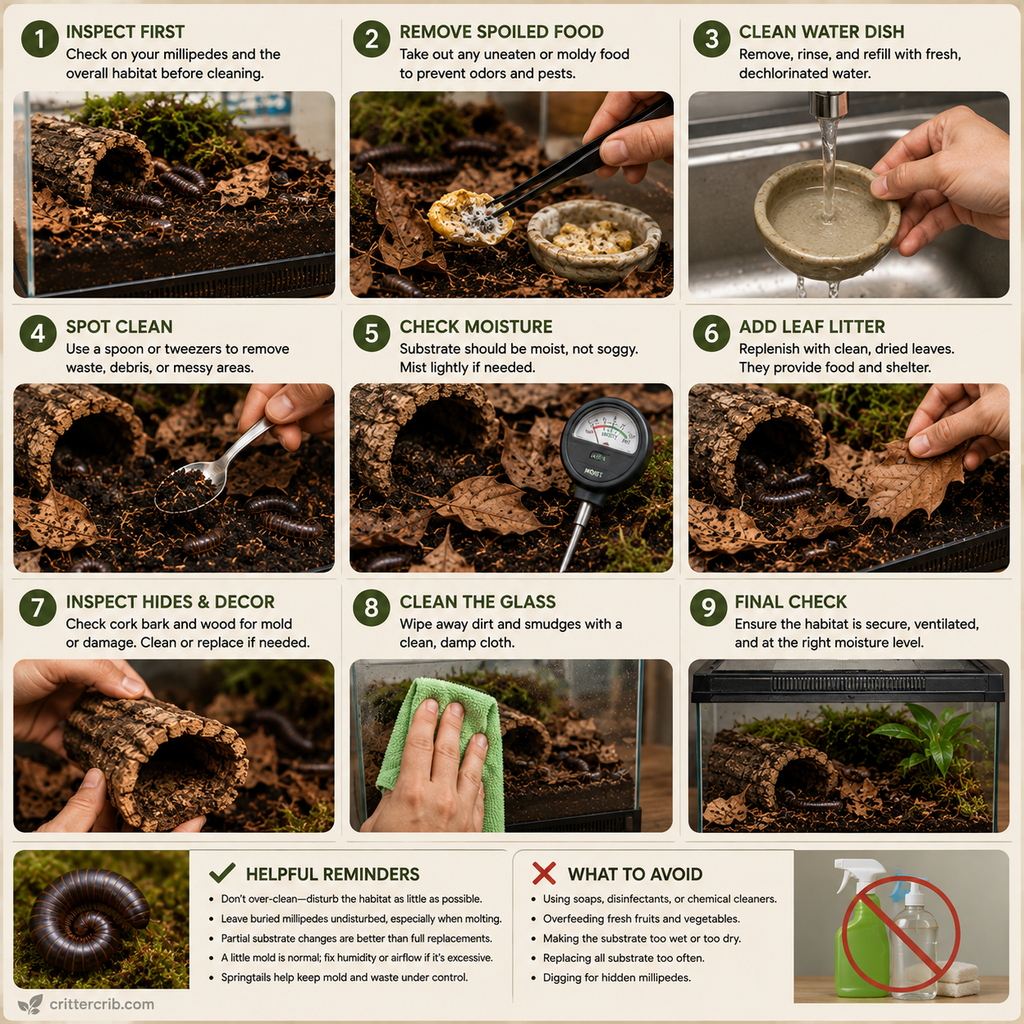
For routine maintenance, keep things simple.
1. Inspect Before You Touch Anything
Before opening the enclosure, look carefully at what’s happening inside.
Where are the millipedes?
Are any partially buried?
Has one disappeared underground?
Is the substrate unusually wet or dry?
Checking first helps you avoid disturbing an animal you didn’t realize was beneath a piece of bark or leaf litter.
2. Remove Spoiled Food
Fresh fruits and vegetables can spoil quickly in a warm, humid enclosure.
Remove anything that has become:
- Moldy
- Slimy
- Fermented
- Heavily decomposed
- Covered with unwanted pests
A small amount of decomposition isn’t automatically dangerous in a detritivore enclosure, but supplemental food shouldn’t be allowed to turn into a large rotting mass.
Offering smaller portions makes cleanup easier.
3. Clean the Water Dish
Not every millipede setup uses a water dish, but if yours does, clean it regularly.
Millipedes may drag substrate into it, and organic debris can accumulate quickly.
Remove the dish, rinse it thoroughly, and refill it with appropriate water.
If more cleaning is needed, make absolutely sure no cleaner residue remains before the dish returns to the enclosure.
For routine care, plain water and physical scrubbing are often sufficient.
4. Spot-Clean Problem Areas
Remove concentrated waste, spoiled food, or other obvious problem areas without excavating the entire enclosure.
A small spoon works well.
Take only the affected substrate and replace it with properly prepared material if necessary.
There’s usually no reason to remove large amounts of healthy substrate because one corner became messy.
5. Check the Substrate Moisture
Cleaning time is a convenient opportunity to check moisture.
Millipede substrate should generally remain moist enough to support the animals without becoming swampy or waterlogged.
Exact moisture requirements vary by species.
Check below the surface rather than judging only by appearance. The top layer may look dry while deeper substrate remains appropriately moist.
If additional moisture is necessary, add it gradually.
Avoid pouring large amounts of water into one area without checking how wet the lower layers already are.
6. Add Fresh Leaf Litter
Leaf litter is both habitat and food.
As your millipedes consume the leaves, replenish them.
Safe hardwood leaves commonly used in millipede enclosures include:
- Oak
- Beech
- Maple
- Magnolia
Leaves should come from areas free from pesticide and chemical exposure and should be prepared appropriately before entering the enclosure.
Keep a generous layer available.
7. Inspect Hides and Decorations
Check cork bark, wood, and other natural materials for problems.
A little fungal activity isn’t automatically a disaster in a humid, decomposer-based environment.
However, remove or replace material that has become excessively moldy, foul-smelling, structurally unsafe, or contaminated.
Before lifting a hide, check whether a millipede could be underneath it.
Lower heavy objects carefully when returning them so you don’t crush an animal burrowed beneath the surface.
8. Clean the Glass if Necessary
Condensation, substrate, and millipede activity can leave the enclosure walls dirty.
You don’t need crystal-clear glass for the animals’ benefit, but cleaning the viewing area makes observation easier.
Use a clean damp cloth or paper towel.
Avoid spraying household glass cleaner into or near an occupied enclosure.
9. Close the Enclosure and Recheck Conditions
Once you’re finished, make sure:
- The lid is secure
- Ventilation hasn’t been blocked
- Substrate moisture is appropriate
- Hides are stable
- Food hasn’t been buried accidentally
- The enclosure hasn’t become too wet during cleaning
Then leave the millipedes alone to settle.
Should You Remove Millipedes While Cleaning?
For routine spot cleaning, usually not.
Leaving them in place reduces unnecessary handling and stress.
Work around visible millipedes and avoid digging through areas where animals may be buried.
Temporary removal may make sense during a major enclosure overhaul, but it shouldn’t be necessary every time you clean a food dish or remove old vegetables.
If you must move a millipede, handle it gently and keep it close to a safe surface.
Never pull on a millipede that is gripping something tightly.
Be Careful With Buried Millipedes
One of the biggest risks during enclosure cleaning is disturbing a millipede underground.
Millipedes burrow for several reasons, including resting, seeking appropriate moisture, and molting.
Molting is especially important.
A millipede must shed its old exoskeleton as it grows. During this process, it can be extremely vulnerable.
Avoid routinely digging through deep substrate just to find a missing millipede.
If an animal has disappeared, there’s a good chance it has a reason for being underground.
How to Clean Around a Molting Millipede
If you know or strongly suspect a millipede is molting underground, avoid disturbing that section of the enclosure.
Continue basic surface maintenance elsewhere.
You can still:
- Remove spoiled surface food
- Maintain appropriate moisture
- Clean accessible dishes
- Check temperature
- Monitor ventilation
What you shouldn’t do is excavate the millipede to check on it.
A molt is one of those situations where less intervention is usually better.
Do You Need to Remove Millipede Poop?
Millipede droppings, or frass, naturally accumulate in the enclosure.
You don’t need to hunt down every piece.
Some waste becomes incorporated into the substrate and decomposes as part of the enclosure ecosystem.
However, over time, heavily used substrate can become depleted and accumulate waste.
That’s where partial substrate maintenance becomes useful.
Rather than constantly removing individual droppings, monitor the overall quality of the substrate.
When Should You Replace Millipede Substrate?
There’s no universal schedule such as “replace all substrate every 30 days.”
In many setups, that’s far too frequent.
Instead, watch for changes.
Substrate may need refreshing when:
- Much of the edible organic material has been consumed
- The structure has broken down significantly
- Waste has accumulated heavily
- The substrate develops a persistent foul odor
- Conditions become difficult to maintain
- There’s contamination that can’t be addressed with spot cleaning
Adding fresh organic material periodically can extend the useful life of the habitat.
Partial Substrate Changes vs. Complete Substrate Changes
Partial changes are usually preferable.
Remove a portion of old substrate and replace it with fresh, appropriately prepared material.
This keeps part of the established environment intact.
It also reduces the risk of throwing away tiny juvenile millipedes or eggs that you didn’t notice.
When Is a Complete Change Necessary?
A full substrate replacement may be justified if there’s a serious problem such as:
- Chemical contamination
- Major pest infestation
- Severe substrate failure
- Persistent foul conditions
- Something harmful accidentally entering the enclosure
Even then, work carefully.
Millipedes, juveniles, and eggs can be hidden throughout the substrate.
What Should You Do With Old Substrate?
Don’t immediately dump old substrate into the trash or garden.
It may contain:
- Tiny juvenile millipedes
- Eggs
- Other enclosure inhabitants
Carefully inspect it first.
If you’re keeping a species that shouldn’t be released into your local environment, never dispose of potentially occupied substrate outdoors.
Contain and dispose of it responsibly according to appropriate local guidance for non-native invertebrates.
Is Mold Dangerous to Millipedes?
A little mold doesn’t automatically mean the enclosure has failed.
Millipede habitats contain damp soil, decaying wood, leaves, and food—the exact materials fungi naturally break down.
Small outbreaks often disappear as the enclosure stabilizes.
However, excessive mold can indicate:
- Too much supplemental food
- Poor ventilation
- Excess moisture
- Large amounts of decomposing material
Remove heavily moldy food and address the underlying conditions rather than immediately replacing the entire enclosure.
Springtails Can Help With Millipede Habitat Maintenance
Springtails are commonly added to naturalistic invertebrate enclosures as a cleanup crew.
These tiny arthropods consume fungi and decomposing organic matter and can help keep mold under control.
They don’t eliminate the need for maintenance, but they can make a humid enclosure easier to manage.
A healthy springtail population is particularly useful in setups containing lots of leaf litter and decaying wood.
What About Mites?
Seeing tiny organisms in a millipede enclosure doesn’t automatically mean you have a dangerous infestation.
Various mites and other small organisms can appear in humid organic substrates.
Some are harmless decomposers.
Others can become problematic in large numbers or may interact directly with the millipedes.
If you notice a sudden population explosion, investigate the enclosure.
Overfeeding is a common contributor to unwanted pest populations.
Reducing excess supplemental food and improving general enclosure maintenance may help, depending on the organism involved.
Avoid reaching immediately for pesticides. Chemicals capable of killing mites can also be dangerous to millipedes.
Cleaning a Millipede Enclosure After a Death
If a millipede dies, remove the body once you’ve confirmed that the animal is actually dead.
Remember that a shed exoskeleton can sometimes be mistaken for remains.
Inspect the surrounding area for anything unusual.
Ask yourself:
- Are moisture levels appropriate?
- Is the substrate waterlogged?
- Is the enclosure unusually dry?
- Is there a foul smell?
- Have other millipedes changed behavior?
- Could contamination have occurred?
One death doesn’t necessarily mean the entire enclosure must be sterilized.
If the remaining animals appear normal and conditions are appropriate, basic cleanup may be sufficient.
Multiple unexplained deaths deserve much closer investigation.
Cleaning Products to Avoid Around Millipedes
Millipedes can be sensitive to chemicals, so avoid casually using household cleaning products around their habitat.
Keep substances such as these away from the enclosure:
- Glass cleaners
- Bleach residue
- Disinfectant sprays
- Scented cleaners
- Air fresheners
- Insecticides
- Pesticides
- Flea sprays
- Essential oil cleaners
Even airborne sprays can potentially reach an enclosure.
If stronger cleaning is ever required for an empty enclosure, rinse thoroughly and make sure no chemical residue remains before rebuilding the habitat.
For routine cleaning, physical removal of debris and plain water are often all you need.
Should You Sterilize Everything?
Routine sterilization isn’t necessary.
A healthy millipede enclosure isn’t supposed to be sterile.
Decaying plant material, fungi, bacteria, and other microorganisms are natural parts of decomposition.
Your goal is balance, not sterility.
Focus on removing obvious problems while preserving the stable environment the millipedes depend on.
How to Keep a Millipede Habitat Cleaner Between Maintenance
Good enclosure management reduces the amount of cleaning you’ll need to do.
Don’t Overfeed
Offer supplemental food in small portions.
If large amounts remain untouched, reduce the next serving.
Use a Feeding Dish
Placing supplemental foods on a shallow dish can make leftovers easier to remove before they disappear into the substrate.
Maintain Appropriate Ventilation
Good airflow helps prevent stagnant conditions while still allowing the habitat to retain necessary moisture.
Keep Plenty of Leaf Litter Available
Leaf litter provides natural food and shelter and encourages normal foraging behavior.
Maintain a Healthy Substrate
Quality substrate helps create a more stable environment and provides an ongoing food source.
Add Springtails
A cleanup crew can help control small amounts of mold and decomposing material.
Common Millipede Habitat Cleaning Mistakes
Cleaning isn’t difficult, but a few mistakes can cause unnecessary problems.
Replacing All the Substrate Too Often
The substrate is part of the millipede’s food source and habitat.
Refresh it as necessary rather than treating it like disposable cage bedding.
Digging for Hidden Millipedes
A missing millipede may be molting.
Leave buried animals alone unless there’s an actual emergency.
Using Household Cleaners
Chemical residues aren’t worth the risk.
Routine enclosure maintenance rarely requires them.
Making the Substrate Too Wet
Adding water during cleaning can accidentally saturate the habitat.
Check moisture before adding more.
Throwing Away Old Substrate Immediately
Tiny juveniles or eggs may be hiding inside.
Inspect old material carefully before disposal.
Removing Every Bit of Mold
A small amount of fungal growth is normal around decomposing organic matter.
Look for the reason behind excessive mold rather than trying to create a sterile environment.
Quick Millipede Cleaning Checklist
For everyday maintenance, keep this routine in mind:
- Check the millipedes before moving anything.
- Remove spoiled supplemental food.
- Clean and refill the water dish if used.
- Spot-clean obvious problem areas.
- Check substrate moisture.
- Add fresh leaf litter when needed.
- Inspect hides and wood.
- Wipe dirty viewing areas.
- Check ventilation.
- Leave buried millipedes undisturbed.
That’s enough for most routine cleaning.
Frequently Asked Questions About Cleaning a Millipede Habitat
How Often Should I Completely Clean a Millipede Tank?
Complete cleanings shouldn’t be done on an arbitrary weekly or monthly schedule.
Spot-clean regularly and refresh or partially replace substrate when its condition indicates that it’s necessary.
How Often Should I Change Millipede Substrate?
There’s no single timetable.
Good substrate may remain useful for a long time, particularly when it’s periodically replenished with leaves and decayed wood.
Monitor its condition rather than relying solely on the calendar.
Can I Use Soap to Clean a Millipede Enclosure?
For routine cleaning, plain water and physical scrubbing are usually preferable.
If any cleaning product is used on an empty item, it must be rinsed extremely thoroughly so no residue remains before it returns to the enclosure.
Should I Remove My Millipede While Spot Cleaning?
Usually not.
Work around the animal and avoid unnecessary handling.
Can I Clean the Tank While My Millipede Is Buried?
You can perform light surface maintenance, but don’t dig through the substrate.
A buried millipede may be molting.
Should I Remove Mold From a Millipede Enclosure?
Remove heavily moldy supplemental food and excessive fungal growth.
A small amount of mold associated with decomposing organic material isn’t necessarily dangerous.
Do Millipedes Need Springtails?
Springtails aren’t mandatory, but they can be extremely useful.
They help consume fungi and decomposing organic material and are commonly used as a cleanup crew.
Why Does My Millipede Tank Smell Bad?
A healthy naturalistic enclosure should smell earthy rather than foul.
A strong unpleasant odor may indicate waterlogged substrate, spoiled food, inadequate ventilation, or excessive decomposition.
Investigate the source instead of covering the smell with scented products.
Final Thoughts on Cleaning a Millipede Habitat
The safest way to clean a millipede habitat is usually to do less—but do it consistently.
Remove spoiled food, clean dishes, monitor moisture, replenish leaf litter, and spot-clean problem areas before they become larger issues. Leave healthy substrate in place and avoid disturbing millipedes that have gone underground.
Most importantly, don’t try to make the enclosure sterile.
Millipedes naturally live among soil, decaying leaves, rotten wood, fungi, and microorganisms. A successful captive habitat recreates part of that living forest-floor environment.
Once the enclosure is established properly, routine maintenance becomes surprisingly simple. Keep an eye on conditions, address small problems as they appear, and save major substrate changes for the times they’re actually needed.
Your millipedes will handle much of the rest.